Revit Model Management: Worksets, Phases and Model Health
How to manage a Revit model: worksets, phases, design options, groups, purging and warnings, and how firms keep model health in check across projects.

Revit model management is the work of keeping one shared model fast, organized and trustworthy while a team builds it. Worksets organize the modeled data, phases and design options decide what the model shows over time and across options, groups handle repeated layouts, and regular purging and warning cleanup keep the file light.
This guide covers each of those parts, what goes wrong as projects pile up, and how firms keep model health in check. Mira, Pirros's free AI agent for Revit, handles common repetitive cleanup and model health issues.
What model management covers
Model management refers to everything that keeps the model itself in good shape, as opposed to the drawings that are generated from the model. Most of it can be found on the Manage and Collaborate tabs:
- Worksets organize the modeled data.
- Phases record what exists, what's new and what has been demolished.
- Design options hold alternatives side by side until the client chooses.
- Groups repeat a layout, such as a workstation or a hotel bathroom, and keep the copies in step.
- Purging removes unused families, types and views.
- Warnings flag geometry that violates Revit's rules, from overlapping walls to duplicate instances.
Worksets: who edits what
A workset is a named collection of elements that multiple people can work in simultaneously. Turning on worksharing from Collaborate tab › Manage Collaboration panel › Worksets makes the file a central model; each person then works in a local copy and uses Synchronize with Central to share changes. Revit starts you with two worksets, Shared Levels and Grids and Workset1, and every element you don't assign lands in Workset1.
Worksets also control what loads. Open a model with only the worksets you need, and Revit skips the rest. That only helps if elements were assigned in the first place.
When someone else owns an element you need to change, Revit asks them to relinquish it, and the request shows up in their Editing Requests. Sync often, and relinquish what you borrowed when you're done, or teammates end up waiting on you. Here's how to set up worksets.
Phases and design options
Phases and design options both let one model show more than one state of the building; they answer different questions.
Phases answer "when". Each element has a Phase Created and a Phase Demolished, and each view has a Phase and a Phase Filter that decide what it shows: existing to remain, demolished, new. Set the phases up in Manage tab › Phasing panel › Phases, in order. The same dialog's Phase Filters tab sets how new, existing, demolished and temporary elements look in each filter, so a demo plan reads the same on every sheet. Here's how to use phases.
Design options answer "which". An option set holds alternatives for one part of the building, such as two lobby layouts, with one marked primary. Views show the primary option unless you set them to another. When the client decides, Accept Primary keeps the chosen option and deletes the rest of the set. Here's how to use design options.
Both change what a view shows, so they are a common reason something seems to be missing. The Revit views guide covers the order to check visibility in.
Groups: repeated layouts
A group ties copies of a layout together, so editing one edits them all. Model elements make a model group and view-specific elements, like text, make a detail group. Edit Group changes every instance at once, and Exclude removes a member from one copy without touching the others. Ungroup turns a copy back into separate elements, and it stops following the others.
Groups work best for layouts that really repeat. A group copied hundreds of times, or nested inside other groups, makes every edit slower and is a common source of warnings. Here's how to group elements.
Purging and model size
Purging removes unused model content: families and types that are never placed, views that nobody opens, line styles and materials left behind by copied work. Save a backup, then click Manage tab › Settings panel › Purge Unused. Revit lists everything it can remove, all checked; clear what you want to keep. In a workshared model, open every workset first, or Revit can't see what's used in the closed ones.
A type placed anywhere in the model is not purged, and neither is a family nested inside one that's in use (Autodesk Help: Purge Unused Objects). Here's how to purge unused.
Unused families are one cause of a heavy model. Other common causes include imported CAD, unused views, large linked files and open worksets. Autodesk's Speed Up Model Open covers the main levers, and here's how to speed up a slow Revit model.
Links and imports
Link other models and CAD files where you can, rather than importing them into the model. A linked file stays separate: it reloads when its source changes, and you can unload it from Manage tab › Manage Project panel › Manage Links when you don't need it. An imported DWG becomes part of the model, and exploding one adds its layers as line styles and brings its text and fill patterns with it.
Imports placed in plan views are one of the usual suspects when a model slows down. Keep consultant models in their own workset, so anyone who doesn't need them can leave that workset closed.
Warnings and model health
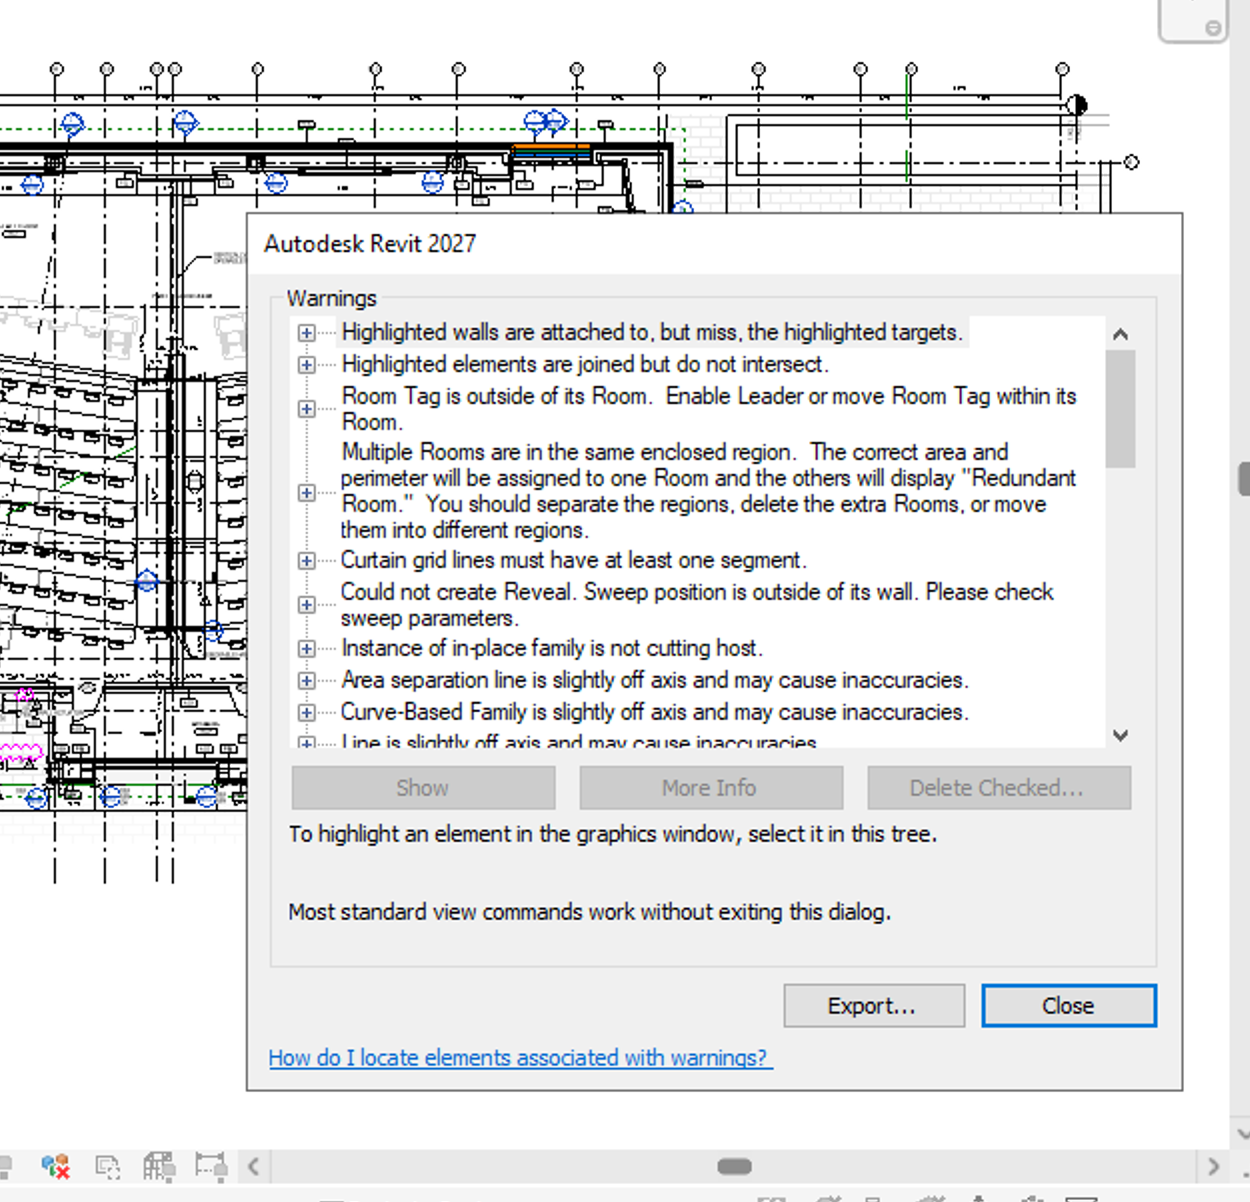
Model health is a way to describe how much is wrong with the model itself: its warnings, its size and what it contains that nobody uses. Revit lists every warning in Manage tab › Inquiry panel › Warnings, where you can select the elements behind each one and export the list. Expand a warning to see its elements, select one and click Show to jump to it, or Export to save the list as an HTML file you can compare between milestones.
The list is easy to ignore. A few hundred warnings look the same as a few thousand until the model starts slowing down, and insignificant warnings aren't visually distinguished from crucial ones. Overlapping walls, duplicate instances and room separation lines on top of walls are common ones worth clearing early, because each issue gets harder to trace as the project grows.
How problems in Revit models compound
Model problems frequently compound across projects, because projects rarely start from a blank sheet. A design team saves an earlier project's model as the new model, carrying along everything in it without being flagged in Revit. Common problems that are only observed when a model is slow to open or a sync fails the night before a deadline:
- Everything sits in Workset1. Nobody assigned elements when worksharing was turned on, so closing worksets doesn't have an impact.
- Warnings pile up unread. The count grows into the hundreds, and nobody knows which ones matter.
- Old options never get accepted. Secondary design options from a decision made months ago are still in the model, and still in every view that shows them.
- Group types multiply. "Unit A", "Unit A 2" and "Unit A copy" each hold a slightly different layout.
- Unused families ride along. Families and types from three projects ago load with every new model.
- The person who knew the model leaves the firm. Nobody else knows why the worksets, phases and options are set up the way they are.
Best practices in model management
Firms that keep models healthy treat model setup as a firm standard with an owner, and check the model on a schedule instead of waiting for problems:
- Start from the firm template. New projects begin from the firm's project template, not from the last project's model.
- Plan worksets up front. Keep a standard workset list, such as Shell and Core, Interiors, Site and Linked Models, and assign elements as they're modeled or placed.
- Set phases and filters in the template. Name the phases and phase filters once, so every project's existing and demo plans read the same way.
- Close design options when the client decides. Accept the primary option and delete the rest.
- Keep groups for real repeats. Don't group elements just to copy them twice.
- Review warnings at each milestone. Clear the kinds that matter, and know what's left.
- Purge and audit at milestones and closeout. Open with Audit checked, purge, and use Compact Central Model when you synchronize.
- Give it an owner. The BIM manager decides the model standards and checks that projects follow them.
How Pirros helps
Pirros, the AI project hub for architects and engineers, keeps the families, details and firm standards every project starts from in one place, so a new model doesn't have to inherit the last one's leftovers.
See model health without opening the warnings dialog
In Pirros's Quality Management System, the Model Performance function looks at the model itself, not the drawings. It groups warnings by type with counts, shows the Revit element ID behind each one so you can go straight to it, and tracks the numbers over time. On a model linked from Forma, the numbers move as people sync; an uploaded model gives a snapshot of that file. Your BIM manager decides what to fix.
Mira handles the repetition; you approve the result
Mira, Pirros's AI agent in Revit, works in the model next to you and is controlled with natural language. It reads the model before it changes anything:
- Closeout cleanup. "At project closeout, purge all unused families, line styles, and view templates from this model." Mira lists what it would remove before it purges.
- Move a category between worksets. "Move all the furniture from Workset1 to the Interiors workset." Mira echoes the scope, how many elements and which parameter, before it writes, then reads every change back.
- Set phases on a selection. "Set the selected walls to Phase Created: Existing and Phase Demolished: New Construction." Mira fills parameters the elements already have; it never creates new ones.
A batch goes in as one step, so one Ctrl+Z puts it back, and Mira names anything it skipped.
Book a demo to see your firm's model health in one place. Working in Revit today? Try Mira free.